Wednesday, April 2, 2014

Nursery Rhymes, Lullabies are Joyful and Brain Building for Children and Parents


Sharing nursery rhymes with young  children is a joyful bonding experience and it also helps children with language and later reading skills.

Three Little Kittens Needle Felted Finger Puppets
Three Little Kittens
When my son was small, we read a thick nursery rhyme book, every night at bedtime. We still have the book, which is in tatters along the edges. All those wonderful memories I just can’t part with. As he got older, that bonding experience matured into fairy tales, then C.S. Lewis’ tales of Narnia, and we spent years on a journey alongside Harry Potter.

One of our favorites: Come Out to Play
Girls and boys, come out to play, 
The moon doth shine as bright as day; 
Leave your supper, and leave your sleep, 
And come with your playfellows into the street.

I remember taking him out on the back porch on a warm night and reciting I See the Moon—
I see the moon and the moon sees me. God bless the moon and God bless me.

I enjoyed the way the rhymes fell off my tongue. While my son and I were relishing warm and fuzzy moments, we were preparing him for later success in reading. Sharing nursery rhymes is a strong predictor of future reading success.

“Nursery rhymes and other repetitive language help children learn to think their way through a word sound by sound in the order in which they hear it,” says Dr. Schickedanz. This ability, known as phonemic segmentation, is best predictor of future reading success, she said in an issue of Parents magazine.

Weave nursery rhymes into the fabric of your young child's life. Reading or reciting nursery rhymes is a comfortable bedtime routine. I would always end the bedtime reading with nursery rhymes or lullabies that encourage sleep—Rock a Bye Baby, Wee Willie Winkie, and Diddle, Diddle Dumpling My Son John (that really is my son’s name as well.)


Nursery rhymes aren’t only for bedtime. You can also reenact the nursery rhymes during the day; I especially recall cantering around the kitchen to This is the Way the Ladies Ride.

Needle Felted Mouse for Hickory Dickory Dock
Hickory, Dickory Dock
Another fun way to share nursery rhymes is with finger puppets. The small soft, wool finger puppets are a nice way to share cozy moments. My son and I also spent many hours creating stories with finger puppets and bendy dolls. Creative storytelling is another fantastic brain-building activity. But that subject is for another blog.


Please check out my finger puppets in my Etsy store. I am also available to make custom orders.

Needle Felted Peter Cottontail Finger Puppet
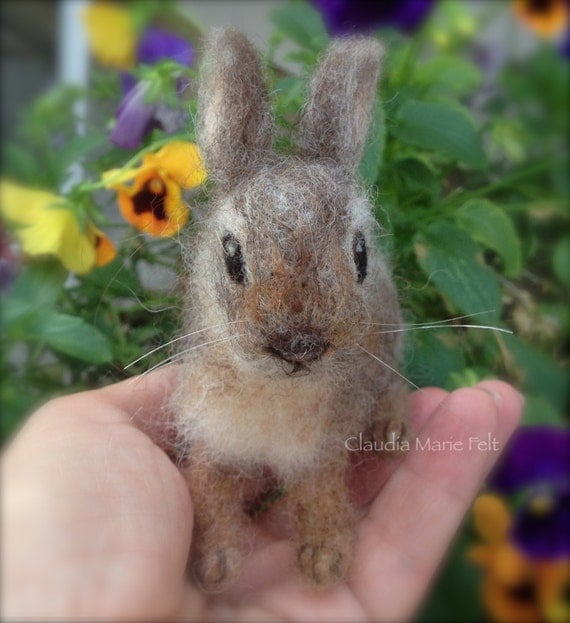
Here Comes Peter Cottontail


LIttle Dog Finger Puppet
There Was a Little Dog
White wool bunny finger puppet
White Bunny Rabbit

Prince and Princess Finger Puppets


Wednesday, January 8, 2014

Rainbow Needle Felt Wool Painting Tutorial

Bring hope and light into your home with an ombre rainbow wall hanging. This is a very easy needle felted project.
I made this rainbow artwork as a backdrop for the cover illustration for a book I worked on in the fall with author Jewel Kats.
After the illustration was done, I loved the rainbow so much and I used it as a backdrop for my needlefelted unicorn in my Etsy shop, Claudia Marie Felt.  I am planning to hang it soon.


Here is what you will need to get started:

1- 2 ounces of Romney wool roving

Wool dye, or food dye

A sheet of 100 percent wool felt

A piece of foam that is nearly as large as your wool sheet

Felting needle

I used Romney wool because it has a nice sheen and you can spread the fibers very thin without getting a stringy look.  The amount of wool you use depends on the size of the piece, but if you have more than needed you can always use the lovely colors for another project.

The dye I use is Greener Shades, but I have also created ombre rainbow wool with food dye. The food dye was easy to use because it did not require a dye pot, just a number of bowls with hot water. However, I prefer the more natural tones I get from Greener Shades.

Rainbow with food dye

Rainbow with Greener Shades

Dyeing Your Ombre Rainbow

Separate your wool roving into 7 even strands. If you are using wool dye with many color choices, you can simply choose to dye the wool the exact shades from the container, but it can be more fun to mix them yourself. You will need blue, purple, red, orange, yellow, green, turqouise. 
When dying with wool dye, you may find it more efficient and less wasteful to create your own colors, rather than discarding the dye bath and starting new each time. For instance, you can dye your yellow and then add some red for your orange dye bath. Likewise, after you have dyed your green wool, add some blue for turquoise. 
With food dye, it is easy enough to have 7 bowls. For food dye, just fill 7 bowls with very hot water and add the food dye. You may want to test the colors with a wisp of wool or a Q-tip. 

To get an ombre color, put 1/3 of the wool strand in the dye pot or color bowl and leave it there for several minutes. (If you are dying in a hot wool pot, do not hang the wool over the side; it will singe.) continue to dip the next one third of the strand into the dye bath and leave it there for a couple of more minutes. The last one-third will just get a quick 30 second or less swirl in the pot.  
You will need to determine for yourself the exact length of time to leave your wool dyeing as it depends on many factors--dye strength, type of dye, etc. 

Hang your 7 colors of ombre dyed wool to dry. 

Creating a Rainbow Wall Hanging
Lay out your sheet of wool on a piece of foam. 
Arrange your strands of dyed wool in order -- Red or Pink, Purple, Blue, Turquoise, Green, Yellow, Orange. It doesn't matter which you start with. 
You will want to arrange the strands in a curve or arch -- be creative!
After you get your basic shape, gently pull the fibers of one color over the other. For instance, a thin edge of green can be pulled over the yellow, creating a lime shade. By doing this, you will have more than seven shades of color and a very beautiful and subtle blending. 

Align the wool colors so that all the deeper shades are at one end, and the lightest shades at the other. You can fill in the remaining sheet of wool with white wool roving. 


Once you are happy with your arrangement, needle felt along the edges to keep the wool in place. Also needlefelt lightly along the rainbow, but don't over felt--you probably don't want it flat. 
For neater edges, fold the wool over the edges and needlefelt along the backside as well. 
Voila!


You may wish to sew a string to the back for hanging or sew or felt tabs and hang on a branch. I am going to seek out a white branch for my rainbow. 

Please let me know if you have any questions. And please share your result on my Facebook page, Claudia Marie Felt.


Monday, October 28, 2013

Top 12 Favorite Needle Felting Fibers

Every time a package of wool or other fibers arrives at my door, it's like Christmas. I love digging my hands into a bag of roving and experiencing the texture. One of my favorite day trips is to The Fold, wool shop, where I can indulge all of my senses in the array of fibers.
Although, most natural fibers can be needle felted, some are better than others. Some are also better for certain tasks, whether doll hair or the fur of a squirrel. It took me a lot of trial and error to discover which fibers to use for which creations. So I'll share a little of what I've learned.

So here is my list of favorite fibers:

Angora -- Difficult to felt, but it adds bunny spirit and feel to some of my luxury bunnies.


Cashmere -- Cashmere is not easy to felt, however it's velvety texture is second to none. I usually blend it with another fiber. My needle felted bunny's underside is one of the places I use cashmere.


Yak -- Similar to cashmere in texture, yak comes in dark colors that add luxury to some of my needle felted animals.

Llama -- Another luxury fiber, easy to felt and adds softness to some of my wool animals.

Camel -- Difficult to felt, but oh so lovely. Similar to cashmere. I sometimes mix in some baby camel with other fibers for my puppies.

Tussah silk -- Tussah silk adds shine and texture to my Waldorf angels' wings. I also use it to accent their dresses and gold-dyed for angel halos.

Corriedale-- A basic wool that is great for the core of my creatures and dolls.

Colonial -- Another wonderful basic core wool and all around multipurpose felting wool.

Shetland -- Can be used for cores, but it is so soft sometimes I would feel guilty putting it inside. Very nice, multipurpose. Some of my creatures are a mix of shetland and alpaca.


BFL -- I love BFL, it has an incredible sheen. I use BFL for the dresses on some of my needle felted dolls. I also love it for wavy hair. When it is wet it curls up.


Merino-- By far one of my most useful fibers. Merino is often the wool that finishes the dressses of my angels and fairies. I also use merino wool for angel wings. Merino is very soft and fine. I also use dark merino wool for some of my woodland creatures.

Alpaca -- My favorite fiber because it is the best of both worlds, easy to felt and luxurious. My woodland creatures wear coats of alpaca. It comes in a variety of natural hues, so often I don't even need to dye it. Suri alpaca also makes wonderful doll hair.


Here are some books that may help you understand wool:


The Field Guide to Fleece: 100 Sheep Breeds & How to Use Their Fibers


The Fleece & Fiber Sourcebook: More Than 200 Fibers, from Animal to Spun Yarn

Wednesday, July 17, 2013

Photos are So Important for Etsy Artists


I spend many hours creating my needle felted animals. It starts with research, either observing live animals or perusing through hundreds of photographs and studying the curve of the head, the shape of the eye. Next, I must find the right hue of fiber. Sometimes, as with my grey-brown bunnies and squirrels, I can use a combination of natural hued alpaca and other natural fibers. Other times, I must dye the fibers combining different colors to get until the perfect hue is achieved. Finally, the actual sculpting, and wiring of the poseable animals, can take days.

When the animal is complete to my satisfaction, my new friend is ready for a modeling session. Etsy artists know that photos are of the utmost importance if you want to be noticed. I photograph my creatures in a variety of settings, both outside and inside. Beware the windy day!


Sunny days aren't good either, they wash out the colors. If I need to take photos on a sunny day, I find a shady spot. And then there's winter. While a snowy background is perfect for my polar bears, it's not the best for a cottontail bunny.

With my smallest creatures, I like to include a photo of the animal in my hand so people can envision the size.


I generally shoot about 30 photos, then pick out my favorites, crop them and adjust the lighting. I often decide I need another pose and take another 10-20 photos. Some creatures are more photogenic than others, just like people. Sometimes I feel my photos don't see my creatures like I do.

I also like to create special photos for my Facebook page, Claudia Marie Felt, like this one with my wool squirrel and raccoon celebrating 500 likes.

My needle felted fawn, looking like Bambi, is one of my favorite photos.


Sunday, June 30, 2013

Miniature Needle Felted Animals


One day I decided my needle felted deer was in need of some woodland friends. I like to put a branch in a small jar filled with salt for a woodland scene. So I created a little wool squirrel and, soon after, a tiny wool cottontail bunny to go with the deer and tree. 


The miniature wool woodland family keeps growing as I have added a chipmunk and a raccoon. 
My tiny animals are made mostly of natural, alpaca fiber which is very soft.


Making tiny needle-felted animals is very enjoyable and a different challenge than my larger creations as I try to create as much as detail as possible in a very small space. The chipmunks and squirrels even have wire frames which allow their arms and tail to be posed. 

Needle felted miniature donkey

This needle felted donkey was a custom order and I love him so much that I would like to make some tiny horses and a unicorn. His mane and tail is made of super soft llama fiber. 


Tiny needle felted racoon


Miniature needle felted bunny


I hope you enjoy my littles as much as I do!


Miniature needle felted robin bird


Tiny needle felted wool bluebird
Tiny needle felted bluebird


Tuesday, May 28, 2013

Inspired by Watercolors


I like the impressionistic style of painting and I like the watercolors colors flow and dance together. The paintings children create in Waldorf classrooms are so peaceful and beautiful. I like to use this loose style of "painting" the dresses on my needle felted dolls.


Apple blossoms start out dark pink and then lighten to white.


I think her dress looks very much like a Waldorf painting.


She was one of my first fairies. I had dyed wool and as the colors were laying to dry, I noticed how they were the colors of the sunset and was inspired to create her. 


Monday, May 20, 2013

Needle Felted Dryads, Tree Fairies


I love all my creations, but I feel my dryads are some of my most creative. The womanly shape that we can sometimes see in a tree. I was a little inspired by Narnia.

Dryads come from the Greek word drys, meaning Oak, so dryads were originally oak trees. I think this dryad was inspired by the oak.


Dryads, shy creatures, became the word for all tree nymphs.

I love the browns of winter against a bright blue sky, snow on the branches, and then one bright spot of red, the cardinal. I think this dryad may be an oak as well.


This forest dryad was totally inspired by my muse. I started working thinking of a purple, floral fairy. But something else took hold and this deep in the dark green pine forest dryad was born.


I hope you enjoy my work.